WebScarab
Introduction
- WebScarab is a framework for analysing applications that communicate using the HTTP and HTTPS protocols. It is written in Java, and is thus portable to many platforms. WebScarab has several modes of operation, implemented by a number of plugins.
- WebScarab operates as an intercepting proxy, allowing the operator to review and modify requests created by the browser before they are sent to the server, and to review and modify responses returned from the server before they are received by the browser. WebScarab is able to intercept both HTTP and HTTPS communication. The operator can also review the conversations (requests and responses) that have passed through WebScarab.
WebScarab How to use
- WebScarab has a large amount of functionality, and as such can be quite intimidating to the new user. But, for the simplest case, intercepting and modifying requests and responses between a browser and HTTP/S server, there is not a lot that needs to be learned.
- Initially, I will assume that you have full unrestricted access to the Internet (that is, you are not behind a proxy). For the sake of simplicity, I will also assume that you are using Internet Explorer. If you need to use a proxy to get out of your corporate network.
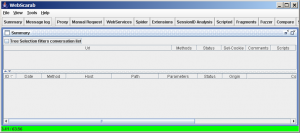
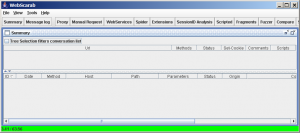
- This is what WebScarab looks like at startup. There are a few major areas that might need explanation.
- Firstly, the toolbar provides access to the various plugins, as well as the Summary window (main view), and messages (log) window.
- The Summary window is split into two parts. On the top is a tree table which will show the layout of the sites that you have visited, and some attributes of the various URLs. Below that is a table showing all of the conversations that have been seen by WebScarab, normally sorted in reverse by ID, so that more recent conversations are at the top of the table. The sort order can be changed by clicking in the column headers if desired.
- In order to start using WebScarab as a proxy, you need to configure your browser to use WebScarab as a proxy. This is configured in IE using the Tools menu. Select Tools → Internet Options → Connections → LAN Settings to get the proxy configuration dialog.
- WebScarab defaults to using port 8008 on localhost for its proxy. You need to configure IE to relay requests to WebScarab, rather than fetching them itself, as shown in the above image. Make sure that all checkboxes are unchecked, except for “Use a proxy server”. Once you have configured IE to use the proxy, select Ok on all dialogs to get back to the browser. Browse to a non-SSL website, and then switch to WebScarab.
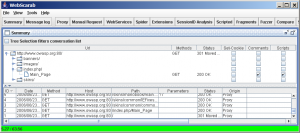
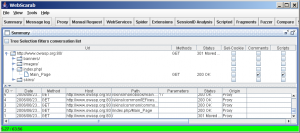
- You should see something similar to the next image. If you don't, or you get an error while browsing, you should go back and check your proxy settings in Internet Explorer as described above. If the proxy settings are correct, one possibility is that there is already another program that is using port 8008, and preventing WebScarab from using it. If so, you should stop that other program. I will also show you how to tell WebScarab how to use a different port a bit later.
- NOTE: If you are using WebScarab to test a site that is running the same computer as the browser (i.e. localhost or 127.0.0.1), and you are using IE7, you will need to add a dot “.” after the hostname to force IE7 to use the proxy that you have configured. This is NOT a bug in WebScarab, but an unfortunate design decision (I assume) made by the developers of IE. Basically, it will ignore any proxy settings if it thinks that the server you are trying to reach is on the local machine. One way of tricking it is to add the dot, as in http://localhost./WebGoat/attack. This will force IE to use your configured proxy.
- Here you can see the tree of URL's, which represents the site layout, as well as the individual conversations that have passed through WebScarab. To see the details of a particular conversation, you can double-click on a row in the table, and a window showing the request and the details of the response will open. You can see the request and response in a variety of forms. The view shown here is the “Parsed” view, where the headers are broken out into a table, and the request or response content is presented according to its Content-Type header. You can also choose the “Raw” format, where the request or response is presented exactly as it would be seen on the wire.
- You can step from one conversation (request/response) to the next in the conversation window using the “previous” and “next” buttons, as well as jumping directly to a particular conversation using the drop down combo box.
- Now that you are familiar with the basic workings of WebScarab, and have made sure that your browser is correctly configured, the next step is to intercept some requests, and modify them before they are sent to the server.
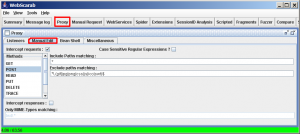
- You enable proxy intercepts via the Proxy plugin, accessible via the “Proxy” button on the toolbar. Then choose the “Manual Edit” tab. Once you click the “Intercept Requests” checkbox, you can choose which request methods you wish to intercept (most commonly GET or POST), and can even choose multiple methods using “Ctrl-click”. Select “GET” for the moment.
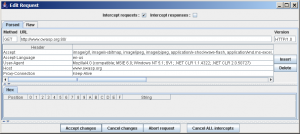
- Now go back to your browser, and click on a link. You should see something like the following window appear (it may only flash in the task
- bar initially, just select it. Future windows will pop-up properly).
- You can now edit any part of the request you choose. Note that the headers are shown already URL-decoded, and anything that you type in will be URL-encoded automatically. If you do not want this to happen, you should use the Raw mode. In some cases, using the Raw mode may be the easiest anyway, especially if you have something that you wish to paste in.
- Once you are happy with your changes, click on the “Accept changes” button to allow the modified request to be sent to the server. If you decide that you wish to revert the changes that you have made so far, you can click on the “Cancel changes” button to allow the original request to be sent to the server. You can also click on the “Abort request” button if you don't want to send a request to the server at all. This will send an error back to the browser. Finally, if there are multiple intercept windows opened (e.g the browser is using several threads simultaneously), you can release all the requests using the “Cancel ALL intercepts” button.
- WebScarab will continue to intercept all requests that match the method you specified until you uncheck the “Intercept requests” checkbox, either in the intercept conversation window, or in the “Manual Edit” tab of the Proxy plugin. But you may be wondering why WebScarab does not intercept requests for images, stylesheets, javascript, etc. If you go back to the “Manual Edit” tab, you will see a field labeled “Exclude paths matching:”. This field contains a regular expression which is matched against the request URL. If there is a match, the request is never intercepted.
- You can also configure WebScarab to intercept responses, in case you want to change the behaviour of some parts of the page. For example, you can disable JavaScript validation, change the list of possible items in a SELECT field, etc.
Tips and tricks
- If you are using IE and you would like WebScarab to automatically update your proxy settings for you, you need to complete the following steps. Note: This only works with the -installer version of WebScarab!
- Change to the Full-Featured interface (Tools → Use Full-featured Interface), then go to the Proxy→Listeners tab.
- Select the only listener showing, and click “Stop”.
- About 2/3 of the way down the screen are several input fields, corresponding to the columns in the listener table.
- Each box should be filled in with the value from the most recently stopped proxy.
- At this point, you can check the “Primary” checkbox, and then click “Start”.
- Your IE proxy settings will automatically be updated to point to WebScarab, and will be reset when you exit WebScarab. This setting will be saved, and used on subsequent runs of WebScarab.
Download
Features
- WebScarab provides a number of plugins, mainly aimed at the security functionality for the moment. Those plugins include:
- Fragments - extracts Scripts and HTML comments from HTML pages as they are seen via the proxy, or other plugins
- Proxy - observes traffic between the browser and the web server. The WebScarab proxy is able to observe both HTTP and encrypted HTTPS traffic, by negotiating an SSL connection between WebScarab and the browser instead of simply connecting the browser to the server and allowing an encrypted stream to pass through it. Various proxy plugins have also been developed to allow the operator to control the requests and responses that pass through the proxy.
- Manual intercept - allows the user to modify HTTP and HTTPS requests and responses on the fly, before they reach the server or browser.
- Beanshell - allows for the execution of arbitrarily complex operations on requests and responses. Anything that can be expressed in Java can be executed.
- Reveal hidden fields - sometimes it is easier to modify a hidden field in the page itself, rather than intercepting the request after it has been sent. This plugin simply changes all hidden fields found in HTML pages to text fields, making them visible, and editable.
- Bandwidth simulator - allows the user to emulate a slower network, in order to observe how their website would perform when accessed over, say, a modem.
- Spider - identifies new URLs on the target site, and fetches them on command.
- Manual request - Allows editing and replay of previous requests, or creation of entirely new requests.
- SessionID analysis - collects and analyzes a number of cookies to visually determine the degree of randomness and unpredictability. Note that this analysis is rather trivial, and does not do any serious checks, such as FIPS, etc.
- Scripted - operators can use BeanShell (or any other BSF supported language found on the classpath) to write a script to create requests and fetch them from the server. The script can then perform some analysis on the responses, with all the power of the WebScarab Request and Response object model to simplify things.
- Parameter fuzzer - performs automated substitution of parameter values that are likely to expose incomplete parameter validation, leading to vulnerabilities like Cross Site Scripting (XSS) and SQL Injection.
- Search - allows the user to craft arbitrary BeanShell expressions to identify conversations that should be shown in the list.
- Compare - calculates the edit distance between the response bodies of the conversations observed, and a selected baseline conversation. The edit distance is “the number of edits required to transform one document into another”. For performance reasons, edits are calculated using word tokens, rather than byte by byte.
- SOAP - There is a plugin that parses WSDL, and presents the various functions and the required parameters, allowing them to be edited before being sent to the server. NOTE: This plugin is deprecated, and may be removed in the future. SOAPUI is streets beyond anything that Webscarab can do, or will ever do, and is also a free tool.
- Extensions - automates checks for files that were mistakenly left in web server's root directory (e.g. .bak, ~, etc). Checks are performed for both, files and directories (e.g. /app/login.jsp will be checked for /app/login.jsp.bak, /app/login.jsp~, /app.zip, /app.tar.gz, etc). Extensions for files and directories can be edited by user.
- XSS/CRLF - passive analysis plugin that searches for user-controlled data in HTTP response headers and body to identify potential CRLF injection (HTTP response splitting) and reflected cross-site scripting (XSS) vulnerabilities.
References
Panel title
Percipit Mnesarchum
Molestie Phaedrum Luptatum
constituam Habeo adipisci Inani
zril Forensibus sea Habeo
adipisci Minimum corrumpit Regione
suscipit Has et partem Percipit
Mnesarchum Molestie Phaedrum
Luptatum constituam Habeo
adipisci Inani zril Vel
nisl albucius Habeo adipisci Minimum
corrumpit Regione suscipit Percipit
maiestatis Regione suscipit Percipit
maiestatis
Subtitle

